
هیچ دوره ای در سبد خرید شما وجود ندارد
انیمیشن (Animation) سازی در اندروید
صفحه نخست »
برنامه نویسی اندروید »
مثال های کاربری »
انیمیشن سازی در اندروید از راه های بسیاری امکان پذیر می باشد. در این فصل ما در مورد یک راه آسان و بسیار استفاده شده در ساخت انیمیشن بحث خواهیم کرد که انیمیشن tweened نامیده می شود.
انیمیشن Tween
tween animation پارامتر هایی مانند شروع، پایان، اندازه، مدت زمان، زاویه ی چرخش و غیره را می گیرد و انیمیشن مورد نیاز روی آبجکت را اجرا می کند، که می تواند برای هر نوع آبجکتی به کار گرفته شود. بنابراین برای استفاده از این برنامه ، اندروید به ما کلاسی به نام Animation ارائه می دهد.
برای انیمیشن سازی در اندروید ، قصد داریم تابع استاتیک ()loadAnimation از کلاس AnimationUtils را فرا بخوانیم. هدف این است که نتیجه را در یک آبجکت انیمیشن دریافت کنیم. سینتکس آن مانند زیر می باشد :
Animation animation = AnimationUtils.loadAnimation(getApplicationContext(),
   R.anim.myanimation);
به دومین پارامتر توجه کنید که نام فایل xml انیمیشن ما می باشد. شما باید یک فولدر جدید به نام anim تحت مسیر res ایجاد کنید و یک فایل xml تحت فولدر anim بسازید.
این گروه انیمیشن عملکردهای سودمند بسیاری دارد که در زیر لیست شده اند.
| شماره | متد و توضیحات |
| 1 | ()start
این متد انیمیشن را شروع می کند. |
| 2 | setDuration(long duration)
این روش مدت زمان یک انیمیشن را تنظیم می کند. |
| 3 | getDuration() This method gets the duration which is set by above method این روش مدت زمانی را به دست می آورد که توسط روش بالا تنظیم شده است. |
| 4 | end()
این روش انیمیشن را به پایان می رساند. |
| 5 | cancel()
این روش انیمیشن را کنسل می کند. |
برای به کار بردن این انیمیشن در آبجکت، تنها روش startAnimation() را از آبجکت فرا خواهیم خواند. ترکیب آن مانند زیر می باشد:
ImageView image1 = (ImageView)findViewById(R.id.imageView1);
image.startAnimation(animation);
مثال
مثال زیر استفاده از انیمیشن در اندروید را توضیح می دهد. شما قادر هستید انواع مختلف انیمیشن را از منو انتخاب کنید ؛ انیمیشن انتخاب شده روی یک imageView روی صفحه به کار گرفته خواهد شد.
برای آزمایش با این مثال لازم است که آن را روی یک مقلد یا یک دستگاه واقعی اجرا کنید.
| مرحله | توضیحات |
| 1 | از Android studio IDE برای ایجاد یک اپلیکیشن اندروید استفاده نموده و آن را تحت پکیج com.example.animation به عنوان Animation نام گذاری کنید |
| 2 | فایل src/MainActivity.java را برای افزودن کد انیمیشن تغییر دهید. |
| 3 | فایل لی اوت XML را به res/layout/activity_main.xml تغییر دهید، اگر لازم است مولفه ی GUI اضافه کنید. |
| 4 | یک فولدر جدید تحت مسیر res ایجاد کنید و آن را anim بنامید. آن را با مشاهده ی res/anim تایید کنید. |
| 5 | روی anim راست کلیک کنید و سپس روی new کلیک کنید و فایل Android XML را انتخاب کنید. شما باید سه فایل متفاوت که در زیر لیست شده اند را ایجاد کنید. |
| 6 | فایل های myanimation.xml ، clockwise.xml ، fade.xml را ایجاد کنید و کد XML را به آن اضافه کنید. |
| 7 | فایل res/values/string.xml را تغییر دهید و مولفه های string مورد نیاز را به آن اضافه کنید. |
| 8 | فایل res/menu/main.xml را تغییر دهید و مولفه های لازم منو را به آن اضافه کنید. |
| 9 | اپلیکیشن را اجرا کنید و یک امولاتور انتخاب کنید و برنامه را روی آن نصب کرده و نتایج را بررسی کنید. |
در اینجا کد تغییر یافته ی src/com.example.animation/MainActivity.java را مشاهده می کنید.
package com.example.sairamkrishna.myapplication;

import android.app.Activity;
import android.os.Bundle;
import android.view.View;
import android.view.animation.Animation;
import android.view.animation.AnimationUtils;
import android.widget.ImageView;
import android.widget.Toast;

public class MainActivity extends Activity {
   @Override
   protected void onCreate(Bundle savedInstanceState) {
      super.onCreate(savedInstanceState);
      setContentView(R.layout.activity_main);
   }

   public void clockwise(View view){
      ImageView image = (ImageView)findViewById(R.id.imageView);
      Animation animation = AnimationUtils.loadAnimation(getApplicationContext(),
         R.anim.myanimation);
      image.startAnimation(animation);
   }

   public void zoom(View view){
      ImageView image = (ImageView)findViewById(R.id.imageView);
      Animation animation1 = AnimationUtils.loadAnimation(getApplicationContext(),
         R.anim.clockwise);
      image.startAnimation(animation1);
   }

   public void fade(View view){
      ImageView image = (ImageView)findViewById(R.id.imageView);
      Animation animation1 =
         AnimationUtils.loadAnimation(getApplicationContext(),
            R.anim.fade);
      image.startAnimation(animation1);
   }

   public void blink(View view){
      ImageView image = (ImageView)findViewById(R.id.imageView);
      Animation animation1 =
         AnimationUtils.loadAnimation(getApplicationContext(),
            R.anim.blink);
      image.startAnimation(animation1);
   }

   public void move(View view){
      ImageView image = (ImageView)findViewById(R.id.imageView);
      Animation animation1 =
         AnimationUtils.loadAnimation(getApplicationContext(), R.anim.move);
      image.startAnimation(animation1);
   }

   public void slide(View view){
      ImageView image = (ImageView)findViewById(R.id.imageView);
      Animation animation1 =
         AnimationUtils.loadAnimation(getApplicationContext(), R.anim.slide);
      image.startAnimation(animation1);
   }
}
در اینجا کد تغییر یافته ی res/layout/activity_main.xml را مشاهده می کنید.
<RelativeLayout
   xmlns:android="http://schemas.android.com/apk/res/android"
   xmlns:tools="http://schemas.android.com/tools"
   android:layout_width="match_parent"
   android:layout_height="match_parent"
   android:paddingLeft="@dimen/activity_horizontal_margin"
   android:paddingRight="@dimen/activity_horizontal_margin"
   android:paddingTop="@dimen/activity_vertical_margin"
   android:paddingBottom="@dimen/activity_vertical_margin" tools:context=".MainActivity">

   <TextView
      android:layout_width="wrap_content"
      android:layout_height="wrap_content"
      android:text="Alert Dialog"
      android:id="@+id/textView"
      android:textSize="35dp"
      android:layout_alignParentTop="true"
      android:layout_centerHorizontal="true" />

   <TextView
      android:layout_width="wrap_content"
      android:layout_height="wrap_content"
      android:text="Tutorialspoint"
      android:id="@+id/textView2"
      android:textColor="#ff3eff0f"
      android:textSize="35dp"
      android:layout_below="@+id/textView"
      android:layout_centerHorizontal="true" />

   <ImageView
      android:layout_width="wrap_content"
      android:layout_height="wrap_content"
      android:id="@+id/imageView"
      android:src="@drawable/abc"
      android:layout_below="@+id/textView2"
      android:layout_alignRight="@+id/textView2"
      android:layout_alignEnd="@+id/textView2"
      android:layout_alignLeft="@+id/textView"
      android:layout_alignStart="@+id/textView"/>

   <Button
      android:layout_width="wrap_content"
      android:layout_height="wrap_content"
      android:text="zoom"
      android:id="@+id/button"
      android:layout_below="@+id/imageView"
      android:layout_alignParentLeft="true"
      android:layout_alignParentStart="true"
      android:layout_marginTop="40dp"
      android:onClick="clockwise"/>

   <Button
      android:layout_width="wrap_content"
      android:layout_height="wrap_content"
      android:text="clockwise"
      android:id="@+id/button2"
      android:layout_alignTop="@+id/button"
      android:layout_centerHorizontal="true"
      android:onClick="zoom"/>

   <Button
      android:layout_width="wrap_content"
      android:layout_height="wrap_content"
      android:text="fade"
      android:id="@+id/button3"
      android:layout_alignTop="@+id/button2"
      android:layout_alignParentRight="true"
      android:layout_alignParentEnd="true"
      android:onClick="fade"/>

   <Button
      android:layout_width="wrap_content"
      android:layout_height="wrap_content"
      android:text="blink"
      android:onClick="blink"
      android:id="@+id/button4"
      android:layout_below="@+id/button"
      android:layout_alignParentLeft="true"
      android:layout_alignParentStart="true" />

   <Button
      android:layout_width="wrap_content"
      android:layout_height="wrap_content"
      android:text="move"
      android:onClick="move"
      android:id="@+id/button5"
      android:layout_below="@+id/button2"
      android:layout_alignRight="@+id/button2"
      android:layout_alignEnd="@+id/button2"
      android:layout_alignLeft="@+id/button2"
      android:layout_alignStart="@+id/button2" />

   <Button
      android:layout_width="wrap_content"
      android:layout_height="wrap_content"
      android:text="slide"
      android:onClick="slide"
      android:id="@+id/button6"
      android:layout_below="@+id/button3"
      android:layout_toRightOf="@+id/textView"
      android:layout_toEndOf="@+id/textView" />

</RelativeLayout>
در اینجا کد res/anim/myanimation.xml را مشاهده می کنید.
<?xml version="1.0" encoding="utf-8"?>
<set xmlns:android="http://schemas.android.com/apk/res/android">

   <scale xmlns:android="http://schemas.android.com/apk/res/android"
      android:fromXScale="0.5"
      android:toXScale="3.0"
      android:fromYScale="0.5"
      android:toYScale="3.0"
      android:duration="5000"
      android:pivotX="50%"
      android:pivotY="50%" >
   </scale>

   <scale xmlns:android="http://schemas.android.com/apk/res/android"
      android:startOffset="5000"
      android:fromXScale="3.0"
      android:toXScale="0.5"
      android:fromYScale="3.0"
      android:toYScale="0.5"
      android:duration="5000"
      android:pivotX="50%"
      android:pivotY="50%" >
   </scale>

</set>
در اینجا کد res/anim/clockwise.xml را مشاهده می کنید.
<?xml version="1.0" encoding="utf-8"?>
<set xmlns:android="http://schemas.android.com/apk/res/android">

   <rotate xmlns:android="http://schemas.android.com/apk/res/android"
      android:fromDegrees="0"
      android:toDegrees="360"
      android:pivotX="50%"
      android:pivotY="50%"
      android:duration="5000" >
   </rotate>

   <rotate xmlns:android="http://schemas.android.com/apk/res/android"
      android:startOffset="5000"
      android:fromDegrees="360"
      android:toDegrees="0"
      android:pivotX="50%"
      android:pivotY="50%"
      android:duration="5000" >
   </rotate>

</set>
در اینجا کد res/anim/fade.xml را مشاهده می کنید.
<?xml version="1.0" encoding="utf-8"?>
<set xmlns:android="http://schemas.android.com/apk/res/android"
   android:interpolator="@android:anim/accelerate_interpolator" >

   <alpha
      android:fromAlpha="0"
      android:toAlpha="1"
      android:duration="2000" >
   </alpha>

   <alpha
      android:startOffset="2000"
      android:fromAlpha="1"
      android:toAlpha="0"
      android:duration="2000" >
   </alpha>

</set>
Here is the code of res/anim/blink.xml.

<?xml version="1.0" encoding="utf-8"?>
<set xmlns:android="http://schemas.android.com/apk/res/android">
   <alpha android:fromAlpha="0.0"
      android:toAlpha="1.0"
      android:interpolator="@android:anim/accelerate_interpolator"
      android:duration="600"
      android:repeatMode="reverse"
      android:repeatCount="infinite"/>
</set>
Here is the code of res/anim/move.xml.

<?xml version="1.0" encoding="utf-8"?>
<set
   xmlns:android="http://schemas.android.com/apk/res/android"
   android:interpolator="@android:anim/linear_interpolator"
   android:fillAfter="true">

   <translate
      android:fromXDelta="0%p"
      android:toXDelta="75%p"
      android:duration="800" />
</set>
Here is the code of res/anim/slide.xml

<?xml version="1.0" encoding="utf-8"?>
<set xmlns:android="http://schemas.android.com/apk/res/android"
   android:fillAfter="true" >

   <scale
      android:duration="500"
      android:fromXScale="1.0"
      android:fromYScale="1.0"
      android:interpolator="@android:anim/linear_interpolator"
      android:toXScale="1.0"
      android:toYScale="0.0" />
</set>
کد res/anim/blink.xml :
<?xml version="1.0" encoding="utf-8"?>
<set xmlns:android="http://schemas.android.com/apk/res/android">
   <alpha android:fromAlpha="0.0"
      android:toAlpha="1.0"
      android:interpolator="@android:anim/accelerate_interpolator"
      android:duration="600"
      android:repeatMode="reverse"
      android:repeatCount="infinite"/>
</set>
کد res/anim/move.xml :
<?xml version="1.0" encoding="utf-8"?>
<set
   xmlns:android="http://schemas.android.com/apk/res/android"
   android:interpolator="@android:anim/linear_interpolator"
   android:fillAfter="true">

   <translate
      android:fromXDelta="0%p"
      android:toXDelta="75%p"
      android:duration="800" />
</set>
کد res/anim/slide.xml :
<?xml version="1.0" encoding="utf-8"?>
<set xmlns:android="http://schemas.android.com/apk/res/android"
   android:fillAfter="true" >

   <scale
      android:duration="500"
      android:fromXScale="1.0"
      android:fromYScale="1.0"
      android:interpolator="@android:anim/linear_interpolator"
      android:toXScale="1.0"
      android:toYScale="0.0" />
</set>
کد تغییر یافته ی res/values/string.xml :
<resources>
   <string name="app_name">My Application</string>
</resources>
کد پیش فرض AndroidManifest.xml :
<?xml version="1.0" encoding="utf-8"?>
<manifest xmlns:android="http://schemas.android.com/apk/res/android"
   package="com.example.sairamkrishna.myapplication" >

   <application
      android:allowBackup="true"
      android:icon="@drawable/ic_launcher"
      android:label="@string/app_name"
      android:theme="@style/AppTheme" >

      <activity
         android:name="com.example.animation.MainActivity"
         android:label="@string/app_name" >

         <intent-filter>
            <action android:name="android.intent.action.MAIN" />
            <category android:name="android.intent.category.LAUNCHER" />
         </intent-filter>

      </activity>

   </application>
</manifest>
می خواهیم اپلیکیشن را اجرا کنیم . فرض می کنیم که دستگاه موبایل خود را به کامپیوتر متصل کرده اید. برای اجرای اپلیکیشن از Android studio یکی از فایل های اکتیویتی اپلیکیشن خود را باز کنید و روی آیکون Run از قسمت نوار ابزار کلیک کنید. قبل از شروع اپلیکیشن، Android studio پنجره ای به نمایش در خواهد آمد که مکان اجرای اپلیکیشن را در آن مشخص می کنید .
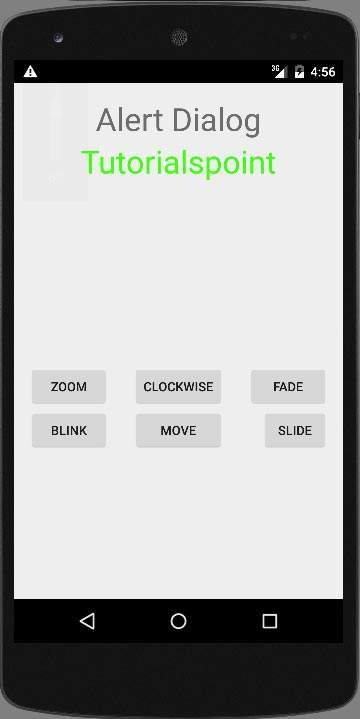
دستگاه موبایل خود را به عنوان یک گزینه انتخاب کنید و سپس آن را چک کنید و صفحه زیر را نمایش می دهد.
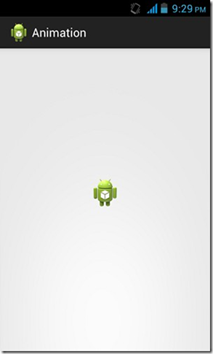
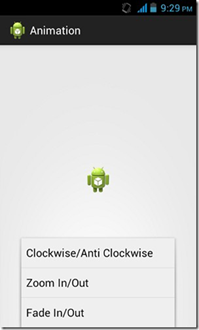
اکنون فقط منو را از موبایل خود انتخاب کنید که پس از آن منویی ظاهر خواهد شد که مانند زیر خواهد بود.
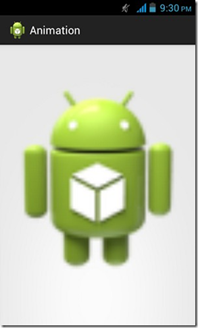
اکنون گزینه ی Zoom in، Zoom out را انتخاب کنید که انیمیشنی ظاهر خواهد شد که چیزی شبیه این خواهد بود.
اکنون گزینه ی clockwise را از منو انتخاب کنید، انیمیشنی ظاهر خواهد شد که به این شکل خواهد بود.
اکنون گزینه ی fade in/out را از منو انتخاب کنید، انیمیشنی ظاهر خواهد شد که چیزی مانند تصویر خواهد بود.
توجه:اگر برنامه را در یک مقلد اجرا کنید، ممکن است تاثیرات یک انیمیشن خوشایند را نداشته باشید. شما باید آن را در موبایل اندروید خود اجرا کنید تا تجربه یک انیمیشن خوشایند را داشته باشید.